
Showing posts with label Eclipse. Show all posts
Showing posts with label Eclipse. Show all posts
Thursday, January 19, 2017
Sunday, July 10, 2016
Troubleshooting - org.eclipse.osgi.internal.framework.EquinoxConfiguration$1
■I have got an error message on Eclipse as below.

■For resolving, I added the following parameters into eclipse.ini.
-Dosgi.configuration.area.default=null
-Dosgi.user.area.default=null
-Dosgi.user.area=@user.dir
-Dosgi.user.area.default=null
-Dosgi.user.area=@user.dir
Sunday, June 14, 2015
Eclipse - Execute the eclipse after I updated the mac OS.
■ After you updated mac OS, If your mac show the following error message when execute the Eclipse.

■■■ This is the solution ■■■
■ Move the java home
$ cd /Library/Java/JavaVirtualMachines/jdk1.7.0_45.jdk/Contents/
■ Edit the following file.
$ sudo vim ./Info.plist
# Before
<key>JVMCapabilities</key>
<array>
<string>CommandLine</string>
</array>
# After<array>
<string>CommandLine</string>
</array>
<key>JVMCapabilities</key>
<array>
<string>JNI</string>
<string>BundledApp</string>
<string>CommandLine</string>
</array>
■ If it doesn't changed anything, make the directory<array>
<string>JNI</string>
<string>BundledApp</string>
<string>CommandLine</string>
</array>
$ sudo mkdir -p /System/Library/Java/JavaVirtualMachines/1.6.0.jdk
$ sudo mkdir -p /System/Library/Java/Support/Deploy.bundle
$ sudo mkdir -p /System/Library/Java/Support/Deploy.bundle
Tuesday, February 24, 2015
Eclipse - How to install the plugin which convert 2 byte words for Unicode automatically.
@Select Help > Install New Software.. in the menu

@ Check the PropertiesEditor above the picture.
@ Read and accept the license agreements, then click Finish.
If you get a security warning saying that the authenticity or validity of the software can't be established, Just click OK.
If you get a security warning saying that the authenticity or validity of the software can't be established, Just click OK.
@ Select Preferences in the menu.

@ Select *.properties in the File Types Box.
@ Select PropertiesEditor in the Associated editors and Click the Default on the right button.
Friday, February 6, 2015
Git - The current branch is not configured for pull
Sometime you see the error like the following message.

Solve:
You tell Git the explicit branch you want to pull.
You need to add this to your .git/config
--------------------------------------------------
[branch "master"]
remote = origin
merge = refs/heads/master
-------------------------------------------------
Solve:
You tell Git the explicit branch you want to pull.
You need to add this to your .git/config
--------------------------------------------------
[branch "master"]
remote = origin
merge = refs/heads/master
-------------------------------------------------
Saturday, May 24, 2014
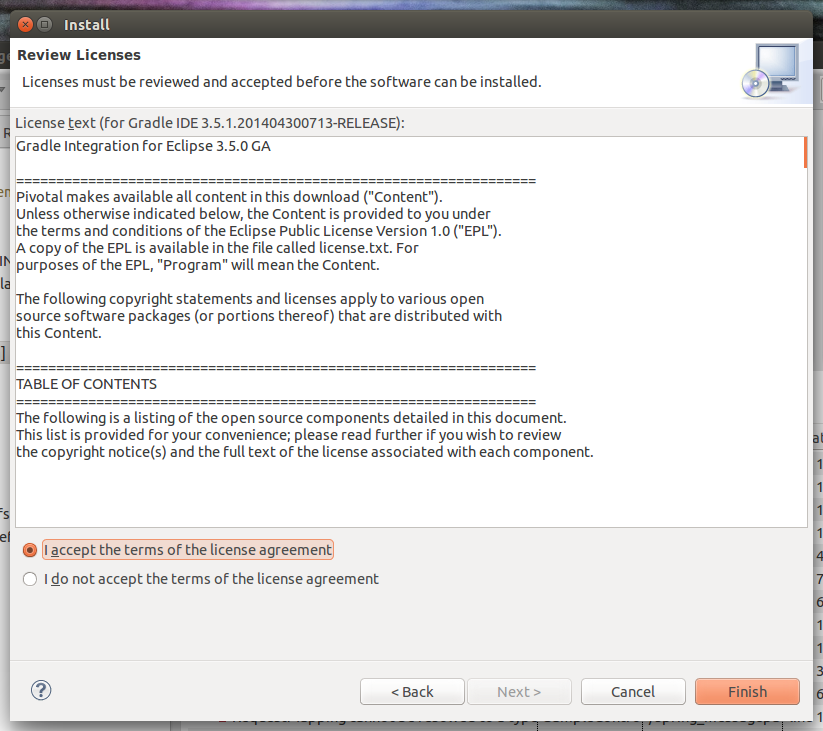
Gradle - install IDE on Eclipse
1. In Eclipse Open Help >> Install New Software
2. Paste a Gradle update site link into the "Work with" text box.
-> http://dist.springsource.com/release/TOOLS/gradle
4. Click the Add button at the top of the screen.
5. Ensure that the option "Group Items by Category" is enabled.
6. Select the Gradle IDE of "Extensions / Gradle Integration".
7. Click "Next". This may take a while.

8. Review the list of software that will be installed. Click "Next" again.

9. Review and accept licence agreements and Click "Finish".
Thank you
https://github.com/spring-projects/eclipse-integration-gradle/
@If you want to install the editor in Groovy, this is
http://groovy.codehaus.org/Eclipse+Plugin
2. Paste a Gradle update site link into the "Work with" text box.
-> http://dist.springsource.com/release/TOOLS/gradle
4. Click the Add button at the top of the screen.
5. Ensure that the option "Group Items by Category" is enabled.
6. Select the Gradle IDE of "Extensions / Gradle Integration".
7. Click "Next". This may take a while.
8. Review the list of software that will be installed. Click "Next" again.
9. Review and accept licence agreements and Click "Finish".
Thank you
https://github.com/spring-projects/eclipse-integration-gradle/
@If you want to install the editor in Groovy, this is
http://groovy.codehaus.org/Eclipse+Plugin
Monday, February 17, 2014
PlayFramework - Setting up your preferred IDE
■ Move to your project directory.
$ cd /usr/local/git/project
■ Start play on your project
$ play
@Refer to this following URL
http://www.playframework.com/documentation/2.2.x/IDE

$ cd /usr/local/git/project
■ Start play on your project
$ play
■ Start play on your project
$ [your_project] eclipse
$ [your_project] eclipse
@Refer to this following URL
http://www.playframework.com/documentation/2.2.x/IDE
Wednesday, January 29, 2014
Eclipse - Making configuration to compile the project existed in the local system.
@Go to the project
$ cd /Users/name/git/project
$ vim ./.project
@Add the following this.
----------------------------------------------------------------------------------------
<buildSpec>
<buildCommand>
<name>org.eclipse.jdt.core.javabuilder</name>
<arguments>
</arguments>
</buildCommand>
<buildCommand>
<name>org.eclipse.m2e.core.maven2Builder</name>
<arguments>
</arguments>
</buildCommand>
</buildSpec>
<natures>
<nature>org.eclipse.jdt.core.javanature</nature>
<nature>org.eclipse.m2e.core.maven2Nature</nature>
</natures>
----------------------------------------------------------------------------------------
@If there is not the [.classpath] file,
@You might need to edit in the properties > Java Build Path > Libraries > JRE System Library in the case
$ vim ./.classpath
----------------------------------------------------------------------------------------
<classpathentry kind="con" path="org.eclipse.m2e.MAVEN2_CLASSPATH_CONTAINER"/>
----------------------------------------------------------------------------------------
Wednesday, January 8, 2014
Eclipse - How to install Freemarker plugin in Eclipse
Help > Install New Software >> add the above update
http://download.jboss.org/jbosstools/updates/stable/helios/
http://download.jboss.org/jbosstools/updates/stable/helios/
Friday, December 13, 2013
Troubleshooting - An error has occurred in Eclipse
For resolve this problem$ eclipse -clean!ENTRY org.eclipse.osgi 4 0 2013-12-13 18:44:55.618
!MESSAGE Startup error
!STACK 1
java.lang.RuntimeException: Exception in org.eclipse.osgi.framework.internal.core.SystemBundleActivator.start() of bundle org.eclipse.osgi.
at org.eclipse.osgi.framework.internal.core.InternalSystemBundle.resume(InternalSystemBundle.java:233)
at org.eclipse.osgi.framework.internal.core.Framework.launch(Framework.java:657)
at org.eclipse.core.runtime.adaptor.EclipseStarter.startup(EclipseStarter.java:274)
at org.eclipse.core.runtime.adaptor.EclipseStarter.run(EclipseStarter.java:176)
at sun.reflect.NativeMethodAccessorImpl.invoke0(Native Method)
at sun.reflect.NativeMethodAccessorImpl.invoke(NativeMethodAccessorImpl.java:57)
at sun.reflect.DelegatingMethodAccessorImpl.invoke(DelegatingMethodAccessorImpl.java:43)
at java.lang.reflect.Method.invoke(Method.java:606)
at org.eclipse.equinox.launcher.Main.invokeFramework(Main.java:629)
at org.eclipse.equinox.launcher.Main.basicRun(Main.java:584)
at org.eclipse.equinox.launcher.Main.run(Main.java:1438)
Caused by: org.osgi.framework.BundleException: Exception in org.eclipse.osgi.framework.internal.core.SystemBundleActivator.start() of bundle org.eclipse.osgi.
at org.eclipse.osgi.framework.internal.core.BundleContextImpl.startActivator(BundleContextImpl.java:734)
at org.eclipse.osgi.framework.internal.core.BundleContextImpl.start(BundleContextImpl.java:683)
at org.eclipse.osgi.framework.internal.core.InternalSystemBundle.resume(InternalSystemBundle.java:225)
... 10 more
Monday, December 9, 2013
Gradle - Add the jars to the dependencies in Eclipse
You need to install the [https://github.com/spring-projects/eclipse-integration-gradle]
I installed this version[http://dist.springsource.com/release/TOOLS/gradle]
build.gradle
$ gradle cleanEclipse eclipse
You can see jars file in the Eclipse
Friday, November 8, 2013
Link - Gradle
@Plug-in in Eclipse
http://www.kaczanowscy.pl/tomek/2010-03/gradle-ide-integration-eclipse-plugin
@Multi-modules
http://blog.tamashumi.com/2012/11/muliti-module-gradle-project-with-ide.html
http://www.kaczanowscy.pl/tomek/2010-03/gradle-ide-integration-eclipse-plugin
@Multi-modules
http://blog.tamashumi.com/2012/11/muliti-module-gradle-project-with-ide.html
Thursday, September 12, 2013
Java - Jetty to run in eclipse
・・Main
・Location
/usr/share/maven/bin/mvn
・Working Directory
1.Browser Workspace
2.Select the project name
・Arguments
-P staging
jetty:run
・Execute
$ CD /.../workspace
$ mvn jetty:run -P staging
・・Environment
@ For Debugging
MAVEN_OPTS = -Xdebug -Xnoagent -Djava.compiler=NONE -Xrunjdwp:transport=dt_socket,address=4000,server=y,suspend=y
・・Run/Debug Configure....
Then, pull up the "Run/Debug Configure...." menu item and select "Remote Java Application" and click the "New" button. Fill in the dialog by selecting your webapp project for the "Project:" field, and ensure you are using the same port number as you specified in the
Now all you need to do is to Run/External Tools and select the name of the maven tool setup you created in step 1 to start the plugin and then Run/Debug and select the name of the debug setup you setup in step2.
@pom.xml - Sample
・Location
/usr/share/maven/bin/mvn
・Working Directory
1.Browser Workspace
2.Select the project name
・Arguments
-P staging
jetty:run
・Execute
$ CD /.../workspace
$ mvn jetty:run -P staging
・・Environment
@ For Debugging
MAVEN_OPTS = -Xdebug -Xnoagent -Djava.compiler=NONE -Xrunjdwp:transport=dt_socket,address=4000,server=y,suspend=y
・・Run/Debug Configure....
Then, pull up the "Run/Debug Configure...." menu item and select "Remote Java Application" and click the "New" button. Fill in the dialog by selecting your webapp project for the "Project:" field, and ensure you are using the same port number as you specified in the
address= property above.Now all you need to do is to Run/External Tools and select the name of the maven tool setup you created in step 1 to start the plugin and then Run/Debug and select the name of the debug setup you setup in step2.
@pom.xml - Sample
Subscribe to:
Posts (Atom)